Python下载中央气象台卫星云图后保存为gif并播放,大致步骤:
- 获取URL
- 下载图片
- 合成GIF
- 播放GIF
1.获取URL
1.1 先下载一份网页源码看看网页结构
保存为:response.txt
#http库
import requests

#准备http请求头
headers = {"user-agent": "firefox"}
#中央气象台卫星云图网页
url = 'http://www.nmc.cn/publish/satellite/fy2.htm'
#获取网页
r = requests.get(url, headers=headers)
#改编码方式支持中文
r.encoding='utf-8'
#保存为文本
with open('response.txt','w', encoding='utf-8') as f:
 f.write(r.text)
1.2 到网页查看图片链接
右键图片---查看元素
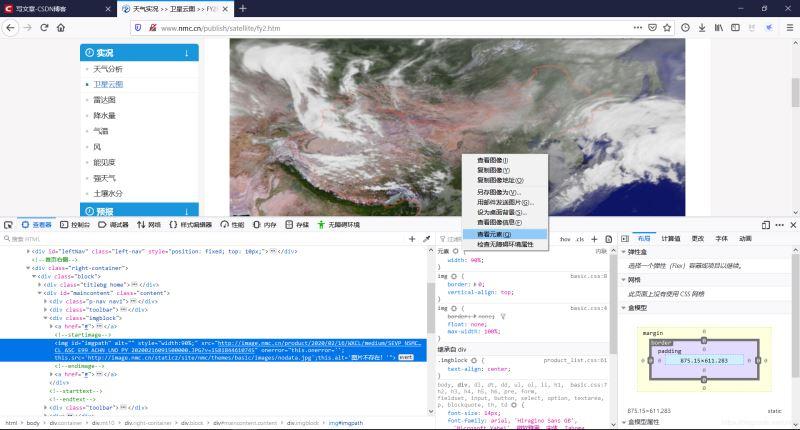
图片链接如下:可以看到图片链接的域名和网页域名不同。
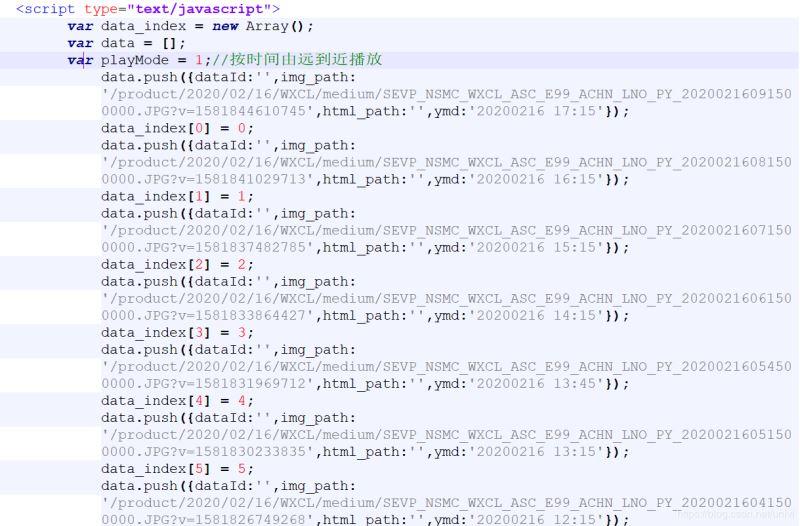
src=<a rel="external nofollow" href="http://image.nmc.cn/product/2020/02/16/WXCL/medium/SEVP_NSMC_WXCL_ASC_E99_ACHN_LNO_PY_20200216091500000.JPG?v=1581844610745">http://image.nmc.cn/product/2020/02/16/WXCL/medium/SEVP_NSMC_WXCL_ASC_E99_ACHN_LNO_PY_20200216091500000.JPG?v=1581844610745</a>1.3 在网页码源response.txt中搜索图片名称
发现有一处列出了动画的12张图片:可以看到12张图片的链接都在script字段中。
1.4 过滤出script,找到所有url
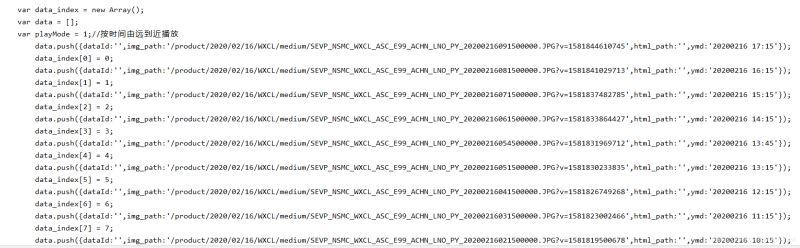
使用html解析库解析出script,script的开头type="text/javascript"作为过滤条件,结果打印看看:
#html/xml解析库
from lxml import etree

#解析response
html = etree.HTML(r.text)
result = html.xpath('//script[@type="text/javascript"]/text()')[2]
print(result)
打印结果如下,可以看到是多行字符串。
根据图片的链接规律,可以用正则匹配出来:
#正则库
import re

urls = re.findall('/product.*.JPG', result)
print(urls)
成功匹配出图片url。注意这里的url只有后半部分,根据之前的图片链接可知,实际图片url还需加上:http://image.mnc.cn。

1.5 因此写获取图片URL函数
def getpage(page):
 try:
  r = requests.get(page, headers=headers)
  html = etree.HTML(r.text)
  result = html.xpath('//script[@type="text/javascript"]/text()')[2]
  urls = re.findall('/product.*.JPG', result)
  return urls
 except Exception as e:
  print(e)
2.下载图片
拿到图片url的列表后,就是下载图片:
#url前缀
base_url = 'http://image.nmc.cn'
def dlpic(urls):
 # 定义一个文件名称收集列表
 filenames = []
 for item in urls:
  r = requests.get(base_url + item, headers)
  #文件名就是用斜杠把字符串分隔,取走后后一个字符串
  filename = item.split('/')[-1]
  filenames.append(filename)
  #保存图片
  with open('wxyt_pic\\' + filename, 'wb') as f:
   f.write(r.content)
  print('已下载:'+item)
 #返回文件名称列表,用于合成gif
 return filenames
3.合成图片
# 图片操作库
import imageio

def makegif(images):
 # 创建空列表,把图片明反序
 frames = []
 images.reverse()
 # 加载12张图片
 for item in images:
  frames.append(imageio.imread('wxyt_pic\\'+item))
 # 合成1张gif
 imageio.mimsave('hecheng.gif', frames, 'GIF', duration=1)
4.播放图片
def playgif(seq=0):
 if set == 0:
  #播放12张合成好的gif
  animation = pyglet.resource.animation('hecheng.gif')
 else:
  pyglet.resource.path = ['wxyt_pic']
  la = os.listdir('wxyt_pic')
  images = []
  for n in la:
   images.append(pyglet.resource.image(n))
  #播放库存中的所有照片
  animation = pyglet.image.Animation.from_image_sequence(images, period=0.5, loop=True)
 #显示动画
 sprite = pyglet.sprite.Sprite(animation)
 windows = pyglet.window.Window(width=sprite.width, height=sprite.height)
 @windows.event
 def on_draw():
  windows.clear()
  sprite.draw()
 pyglet.app.run()
5.整体代码
import requests
from lxml import etree
import imageio
import re
import pyglet
import os


# 在脚本同目录下,新建一个文件夹,存储当天12张图
def ckdir():
 if os.path.exists('wxyt_pic') == False:
  os.mkdir('wxyt_pic')


# 获取图片url列表
def getpage(page):
 try:
  r = requests.get(page, headers=headers)
  html = etree.HTML(r.text)
  result = html.xpath('//script[@type="text/javascript"]/text()')[2]
  urls = re.findall('/product.*.JPG', result)
  return urls
 except Exception as e:
  print(e)


# 下载图片
def dlpic(urls):
 filenames = []
 for item in urls:
  r = requests.get(base_url + item, headers)
  filename = item.split('/')[-1]
  filenames.append(filename)
  with open('wxyt_pic\\' + filename, 'wb') as f:
   f.write(r.content)
  print('已下载:'+item)
 return filenames


# 制作gif
def makegif(images):
 frames = []
 images.reverse()
 for item in images:
  frames.append(imageio.imread('wxyt_pic\\'+item))
 imageio.mimsave('hecheng.gif', frames, 'GIF', duration=1)


# 播放gif
def playgif(seq=0):
 if set == 0:
  #播放12张合成好的gif
  animation = pyglet.resource.animation('hecheng.gif')
 else:
  pyglet.resource.path = ['wxyt_pic']
  la = os.listdir('wxyt_pic')
  images = []
  for n in la:
   images.append(pyglet.resource.image(n))
  #播放库存中的所有照片
  animation = pyglet.image.Animation.from_image_sequence(images, period=0.5, loop=True)
 #显示动画
 sprite = pyglet.sprite.Sprite(animation)
 windows = pyglet.window.Window(width=sprite.width, height=sprite.height)
 @windows.event
 def on_draw():
  windows.clear()
  sprite.draw()
 pyglet.app.run()


# init
if __name__ == '__main__':
 base_url = 'http://image.nmc.cn'
 page = 'http://www.nmc.cn/publish/satellite/fy2.htm'
 headers = {"user-agent": "firefox"}
 ckdir()
 urls = getpage(page)
 images = dlpic(urls)
 makegif(images)
 # 0只播放今天12张,1播放库存里所有照片
 playgif(1)
6.最终效果

以上就是本文的全部内容,希望对大家的学习有所帮助,也希望大家多多支持python博客。
-
<< 上一篇 下一篇 >>
标签:requests
python下载卫星云图合成gif的方法示例
看: 1580次 时间:2020-07-29 分类 : python教程
- 相关文章
- 2021-12-20Python 实现图片色彩转换案例
- 2021-12-20python初学定义函数
- 2021-12-20图文详解Python如何导入自己编写的py文件
- 2021-12-20python二分法查找实例代码
- 2021-12-20Pyinstaller打包工具的使用以及避坑
- 2021-12-20Facebook开源一站式服务python时序利器Kats详解
- 2021-12-20pyCaret效率倍增开源低代码的python机器学习工具
- 2021-12-20python机器学习使数据更鲜活的可视化工具Pandas_Alive
- 2021-12-20python读写文件with open的介绍
- 2021-12-20Python生成任意波形并存为txt的实现
-
搜索
-
-
推荐资源
-
Powered By python教程网 鲁ICP备18013710号
python博客 - 小白学python最友好的网站!